
Speedometer type visualization are popular in Dashboard applications. Usually it is used when you want to display single metric against a particular target.
In mockuptiger, you can wireframe a skeleton or full blown dial widget using static value. Here is the basic data structure for the dial wireframes
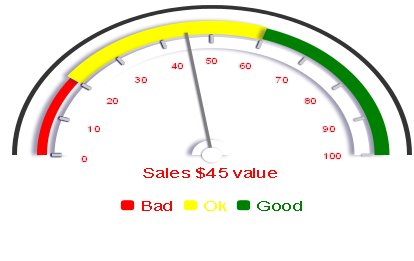
And here is the data structure for the above mockups
1. "range_min_max":[0,100],
2. "ticks_angle_min_max":[180,360],
3. "range_legend":["Bad","Ok","Good"],
4. "ranges":[ [0,20],[20,60],[60,100],[0,100] ],
5. "range_color":["red","yellow","green","white"],
6. "value_template":"Sales $# value ",
7. "pointer_value":[45],
8. "arc_angle":[180,360],
9. "arc_radius":[-5,-10,-20,20],
10."arc_color":["white","white","white","white"],
11."tick_radius":[-50],
12."tick_number_radius":[-70],
13."tick_length":[10],
14."tick_width":[3],
15."range_radius":[-30,-30,-30,-50],
16."range_thickness":[10,18,15,15],
17."value_display":[0,15],
18."value_font_size":6,
19."pointer_radius":[-35],
20."pointer_width":[3],
21."pointer_color":["#7D7D7D"],
22."legend_display":[0,60]
—
To understand how to work with dials, there are two basic components.
1. The angles that defines the shape of the arc
2. The range values that are distributed acros the length of the arc
How to define the shape of the gauge arc
If you look at a circle, then w.r.t Mockups, the bottom point is 90 degree angle, the left is 180 degree, top is 270 degree and the right is 360 degree.
We will just use this frame of reference and not worry about any type of co-ordinate system, shall we?

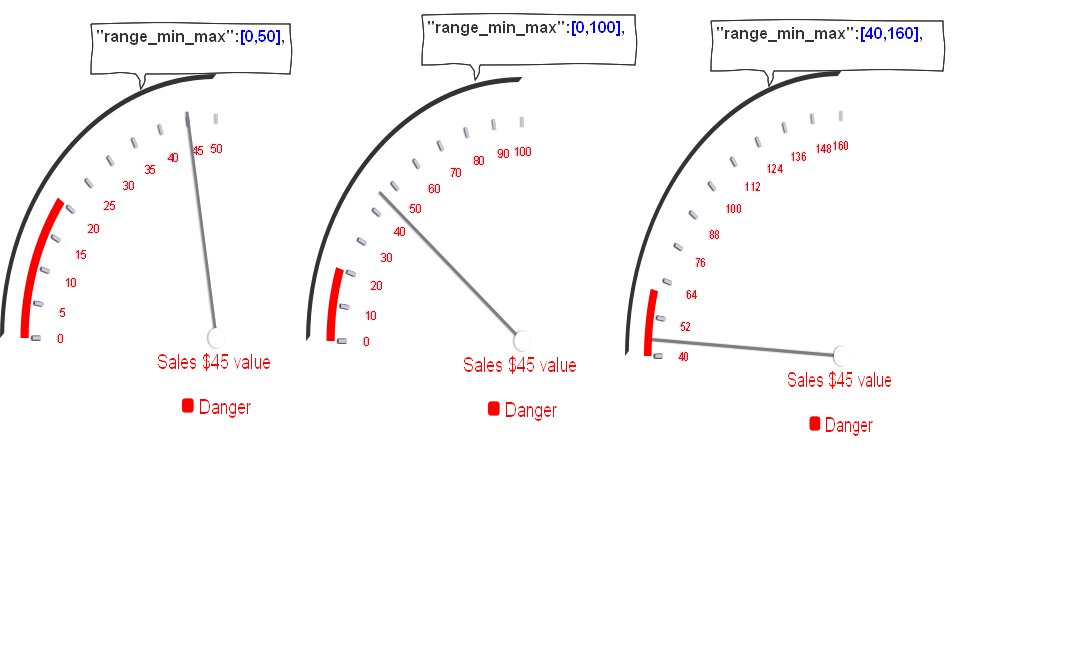
In the above figure, property #2 ticks_angle_min_max define the arc angle that will house the range of numbers.
so the the property #1 range_min_max : [0,50] define the spread of numbers on the arc.
In the figure below, the range varies in each type e.g [0,50] , [0,100], [40,160] but the arc angle or the shape remains the same.
How to change the shape of the dial.
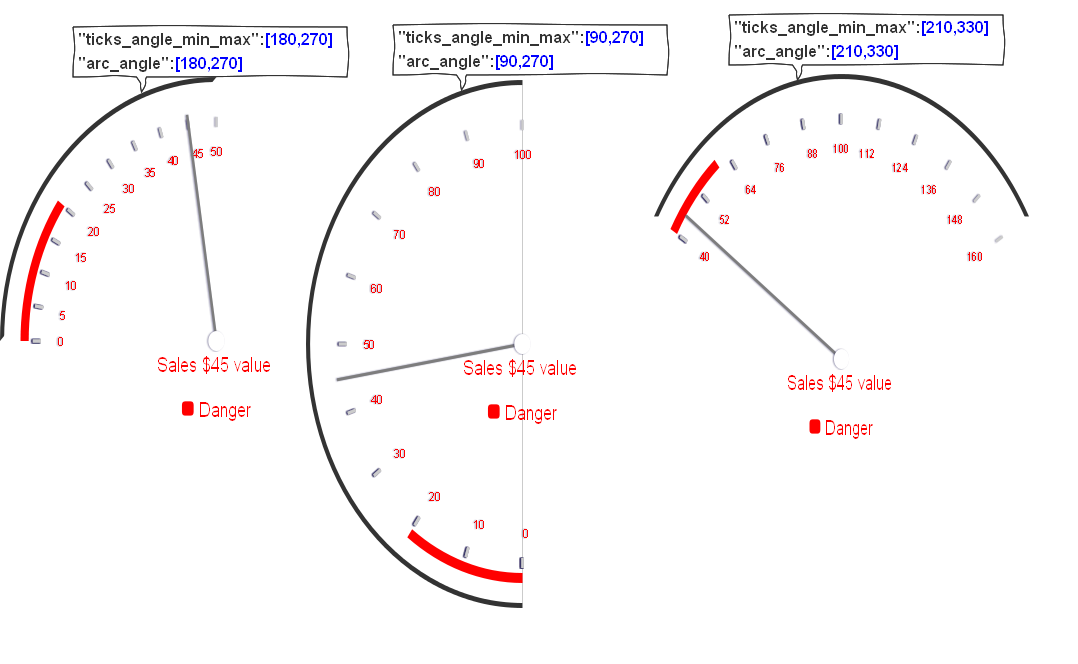
As you see in the below figure, you can customize the shape of the arc by manipulating the arc and the ticks angle. There are two places you need to modify the angles.
#2 ticks_angle_min_max and #8 arc_angle. You can have #2 and #8 different angles. For e.g #8 can be defined to show a full circle and the
ticks angle #2 can just be a quarter or semi circle. In the below figure the ticks angle and arc angle are kept the same for consistent look.
The arc_angle is used to define the outer circle and as we will see below you can define as many concentric circles as you need.
How to define ranges
In dials/meter there is practice of defining three color ranges. Usually it is red, yellow and green. In our mockups, we can define as many ranges as needed. The minimum requirement is of atleast 1 range.
Range is defined using the property#4 ranges: [ [0,20] , [20,40] , [40,60] ]
The above property value defines three ranges
1st range => 0 to 20
2nd range => 20 to 40
3rd range => 40 to 60
Once we define the range, we can assign colors to each range. This is done using the property #range_color : [“red”,”yellow”,”green”]
so with the above range definition
1st range color => red
2nd range color => yellow
3rd range color => green
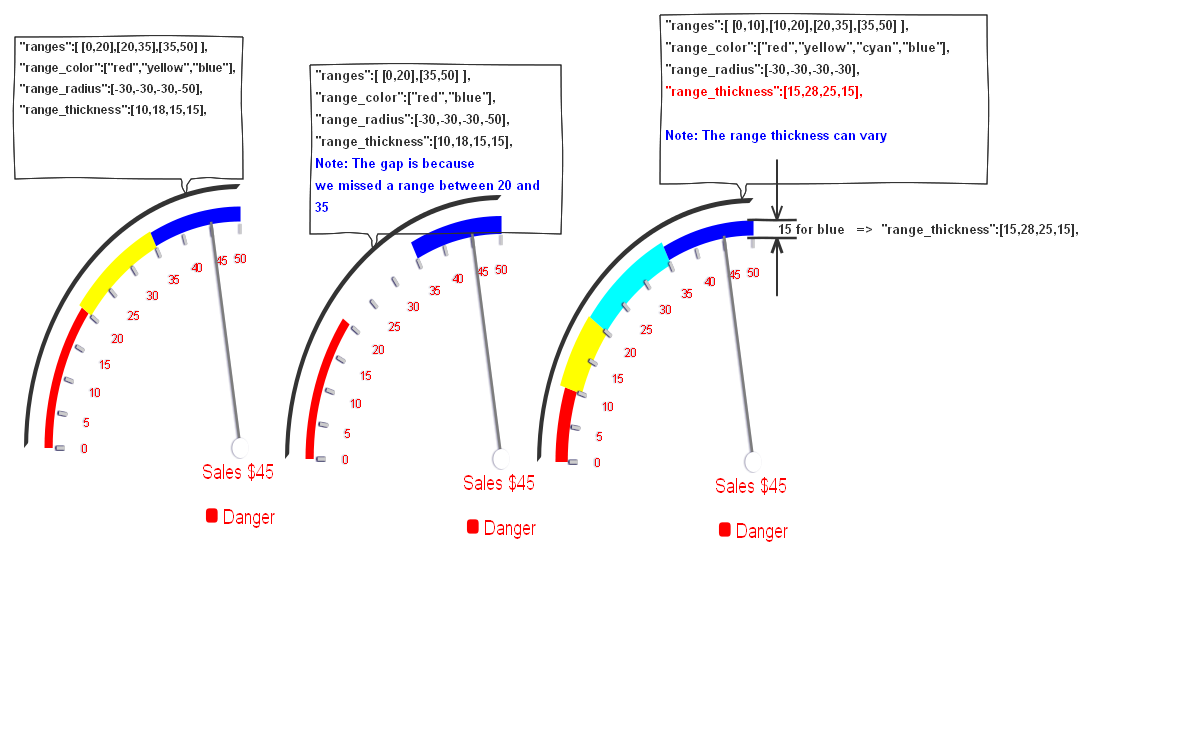
In the below figure, you will see that you can also skip a range or create a gap in the arc. In the second example below, the range is defined from
0 to 20 and the second range is from 35 to 50. So there is no range defined from 20 to 35 and hence the gap.
Another range property is the range_radius and range_thickness.
#15 range_radius defines the distance of the range arc from the center of the dial. You can show the red arc appear closer to the circle or further away. Each range arc can be at any distance from the center. If you provide a negative value for the range radius then the actual radius is the sum of dial radius and range radius.
#16 range_thickness defines how thick the range arc is. You can define the red arc to be thinner than the yellow arc and so on.
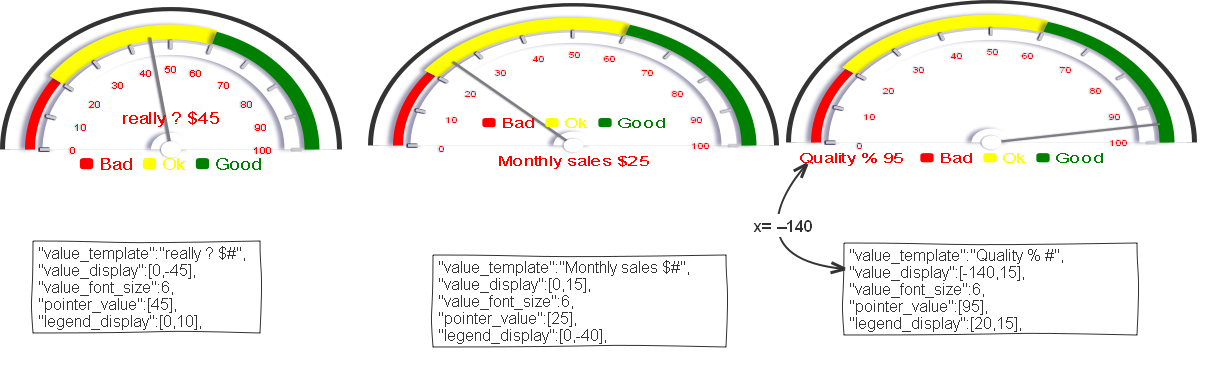
How to define the dial Pointer value
#6. “value_template“: “Sales $# value “,
#7. “pointer_value” : [45],
#17.”value_display“: [0,15],
#22.”legend_display“: [0,60]
#6 value_template defines the way you want to display the pointer value. The # character in the template is replaced with the value referenced by #7 pointer_value.
#17 value_display defines the relative coordinates of the string that displays the value template inside the dial. The value [0,0] is the center of the dial, so the value of [0,15] means x is at the center and y is 15 points below the center.
The value [0,-30] will mean the x is at the center and y position is 30 points above the center.
Same is the case with the x,y cordinates for the legend_display
You can start by just changing the color values or radius values to understand how each property behaves.